I looked online for a stock Pantera radiator and couldn't find many options that I found affordable and made sense to me. I checked out having one made - but that wasn't economically feasible. I really wanted to just find a radiator option from a readily available car in production now.
I did a lot of looking but didn't find anything that would fit my car. Then one day my son said, "Have you tried looking at a radiator from a Toyota MR2?" I know, I know this car is so much more under-powered when compared to a Pantera with a Coyote engine, but what the heck, let's take a look.
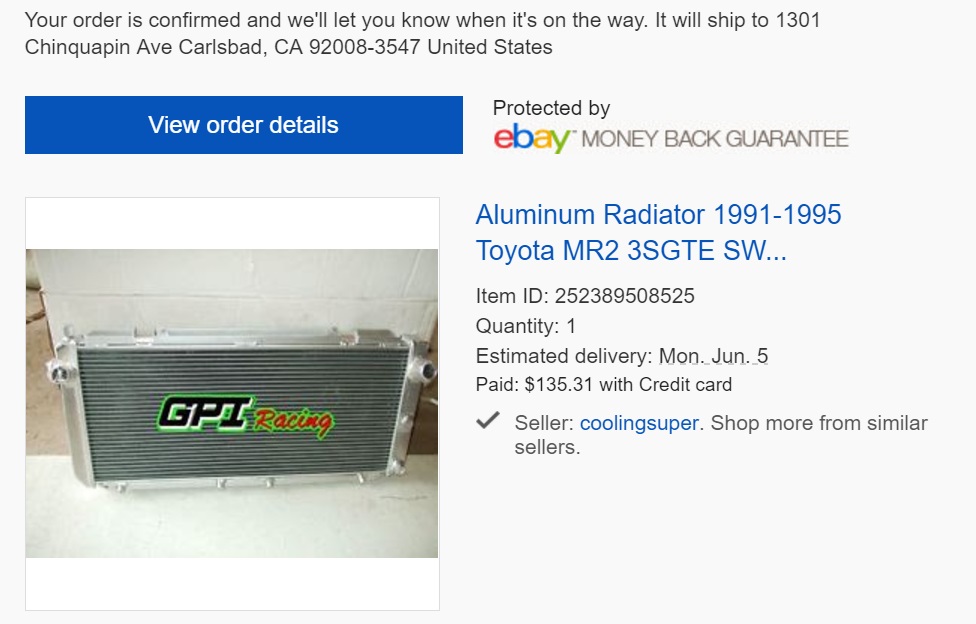
I got online and found that the radiator was exactly the size I wanted (15" wide by 30" tall). I found a new, two-row aluminum radiator for a whopping $135. To top it off, the twin electric fan with shroud cost only $185. Less than $500 and the cooling was looking good.
Will it work and keep the old girl cool? We will have to wait to see. I did get a radiator that was for the turbo version of the MR2 - hopefully that will be all I need. Here's a shot of the radiator I bought and the p/n of the electric fan that I am using.

I decided that I wanted to lay the radiator down as flat as possible to let the cooling fans have plenty of room to pull air through the radiator. I saw this done on several Panteras and was told this gives more cooling ability especially when vents are added to the hood - a project I will take on later.
I had to do a little surgery to the brackets on in the front where the radiator resides so that it would lay down like I wanted it to. Here's a before and after shot of the space in question. In the second picture you can see how the brackets were modified.


I made a set of brackets that would would allow the radiator to lay carefully in place at the angle I needed for it to be set in the car. Here's a shot of what the radiator looks like laying in place.

I then secured the radiator in place with two side brackets. Now it is securely in place. Here's a shot of the mounted radiator.

With the radiator securely in place it was time to plumb it up. I decided to use flexible stainless steel tubing to hook the radiator to the tubing under the car running to the engine. Here's a shot of the kits I used (2 total @ approx $30 each).

As you can see the inlet and outlet are in the upper corners of the radiator. I needed to turn the inlet and outlet in a quick 90 degree down to hook the radiator to the stainless steel pipes I placed under the car running to the engine. I went to the auto parts store and found a radiator hose that is 1.25" x 1.5" dia with a 90 degree turn. With a little trimming this fit perfectly. Here's a shot of the part numbers of the two parts I bought (one from two different parts stores).


It all went into place quite simply. Here's some shots of the finished product.


