One day I was at the local pick-a-part yard looking for something for another project when I came across a really weird looking two door hatchback. It kind of looked like a Mustang but not really. I couldn't find any badges on it (other than a Ford badge). I ran the VIN and found it was a 1984 Ford Escort made for sale in Canada.
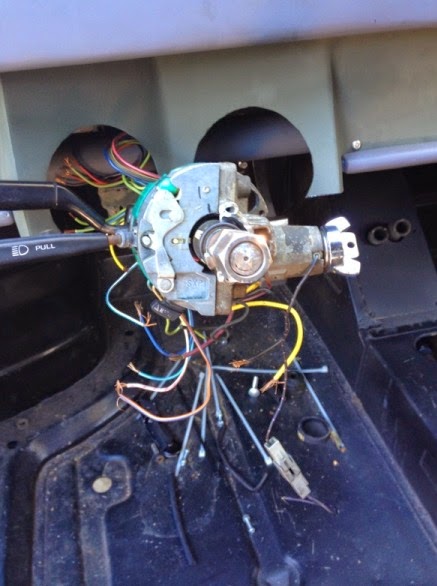
I just so happened to look at the steering column and saw that the ignition had the key in it. Not something you see to often at this particular pick-a-part place. The turn signal and windshield wiper switch both felt solid, as did the ignition switch. I really liked how it was all built in a relatively compact way around the steering column. The other thing I liked about this set up was the fact that the horn is located on the turn signal arm itself. I really didn't want to try and figure out how to get a horn working on whatever steering wheel I ended up using on my car. I decided to take the assy apart and check it out as to how it might fit on the Pantera.
It came apart really easily. I took with me the entire plastic cover and the steering shaft itself. I ditched the steering wheel and all the couplings since I had plenty to choose from from the parts I have from the Pantera. Sadly I elected not to take the windshield wiper motor and before I could get back there the car was sent out to be junked. The entire steering column assy cost less than $45! I figure that if something fails to work it should be a part that can be purchased from the local parts store for a decent price.
I knew that the current steering shaft would need to be heavily modified to make this assy work if it was to work at all. When I got the parts home I started marking up what needed to be changed. I decided to use the steering shaft from the Escort and weld on the end of the old Pantera's shaft to enable it to be attached to the original couplers. Here's a couple pictures showing that process.
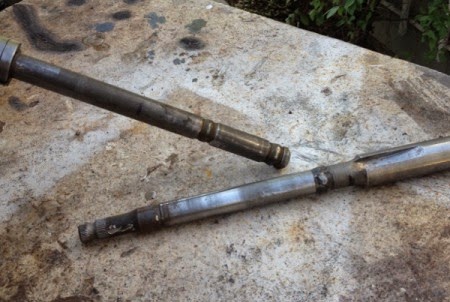
This first shot shows the two shafts. The Pantera shaft is the one on the bottom. If you look close you can see a black line showing where I need to cut the shaft to weld it to the bottom of the Escort shaft shown above the Pantera shaft.
This shot shows the two shafts welded together. I used angle iron to help center the two shafts together (with some shims since the Pantera shaft was about 0.030" smaller in dia than the Escort shaft) and to keep them as straight as possible. It came out pretty good.
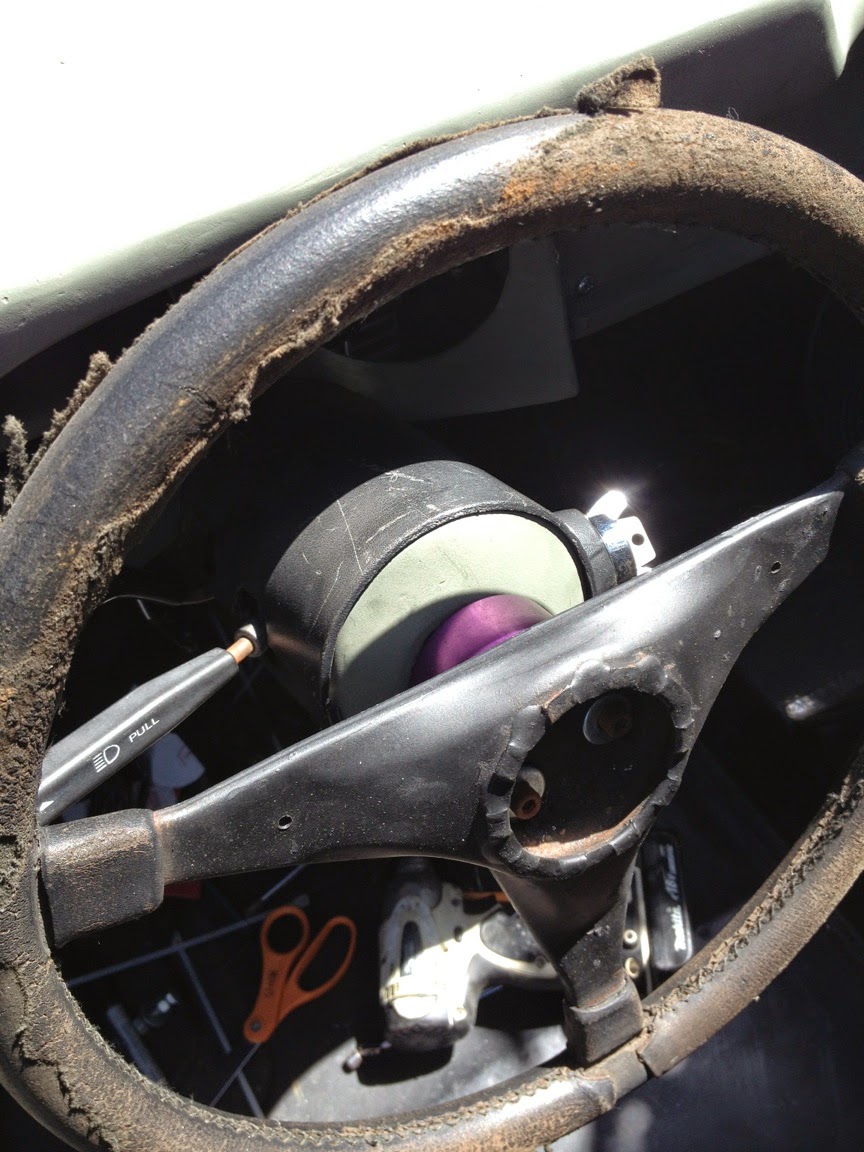
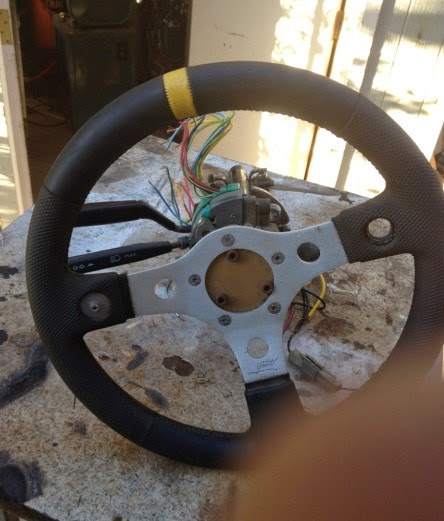
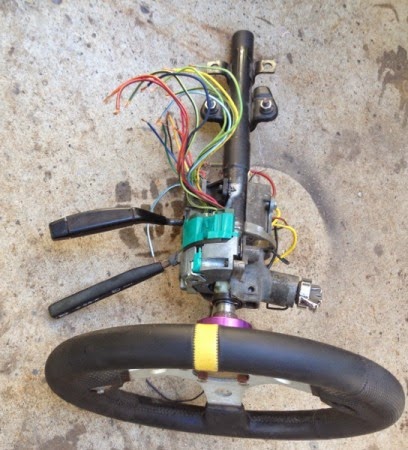
By using the Escort shaft I was able to use the Escort's turn signal switch canceling feature. I had to cut the Pantera's steering shaft housing to fit the Escort's ignition switch internals. Basically two slots had to be cut into the housing to help secure the ignition switch. I also had to lengthen the steering column housing by about 1 5/8" to fit everything into place. Also, two sets of tabs had to be welded onto the Pantera's steering column housing to mount the assy from the Escort. It came out amazingly good. Here's a few shots of the assy with a Grant, quick release, removable steering wheel.
I then took the assembly and went to bolt it up into the Pantera. I already knew that my custom dash was going to have to be modified to make this thing fit. Turns out that the previous owner had mounted the steering column in a manner that made the steering wheel closer to the floor pan of the car. This in turn made me position my gauge holes and the entire gauge face too low for the car.
Out came the angle grinder and cutoff wheel. After a few whacks I had the assembly ready to fit into place. I will need to take out the dash face and relocate the gauge holes up at some time in the future. I found when I mounted the steering column assembly that the back end of the Escort electronics were hitting my dash and the wiper switch arm was way too close to the dash panel as well. I decided that I needed the steering column to come closer to the seat by about 1/2".
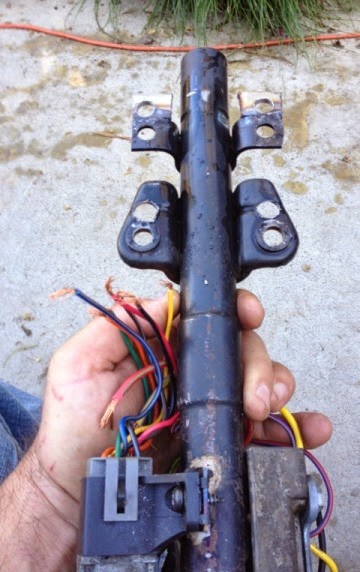
I welded some tabs to the back mounting holes on the steering column tube and drilled out new holes on the front tabs. This enabled me to shift the entire steering column assembly out where I needed it. Here's a shot of the modified steering column mounting assy.
After bolting it all up I took a long hard look at that Grant steering wheel and didn't like what I saw. I have an original Pantera wheel - in rough shape to say the least but still an original one. I really like the size of the original wheel and know I can get parts to make it look good from different vendors. I really like, no I think I really need the detachable wheel option that the Grant wheel offers given that I'm 55+ and 6'5" tall. Getting in and out of the Patera will really be expedited if I could remove the steering wheel.
As I sat there looking at the two wheels I decided to modify the Panteral wheel to make it detachable using the quick release mechanism from the Grant wheel. To modify the existing Pantera wheel I cut off the bellows part of the wheel that mounted to the steering column, leaving only about 3/16" of an inch protruding from the back of the wheel.
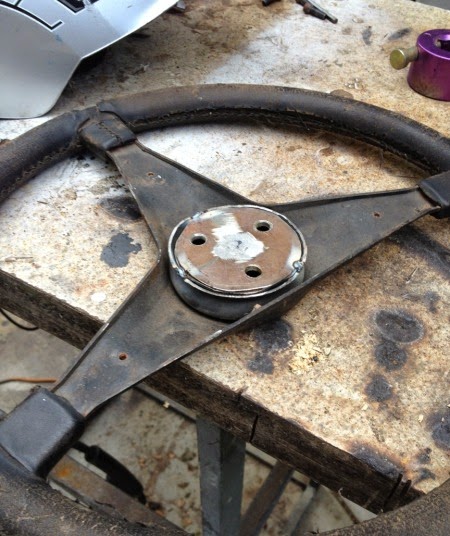
I then made a bracket with three holes to mount the quick release mechanism out of sheet steel. I used the existing quick release brackets as a template to lay out the mounting holes. I cut the sheet steel in a circle to fit just inside the remaining small piece of bellows on the back of the original Plantera wheel and welded it all up. Here's a couple shots showing the fabrication process.
The wheel now snaps in and comes out like a breeze. Here's a shot of what the wheel looks like attached to the shaft using the quick disconnect feature.
Here's a few shots of the entire assembly installed in the Pantera, with and without the Patnera wheel in place.
In that last shot you can really see how much adjustment I need to make on the holes I cut out for the gauges on my instrument panel. That modification will be discussed in a post later on.
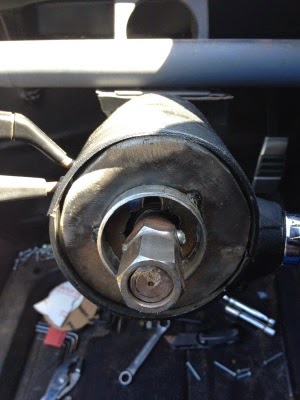
OK - Here's an update on the column. As I was working on moving the gauge holes up to where they need to be (see post on dash manufacture to read that update), I saw that I needed to so something with the big open space behind the steering wheel. I just didn't want to be looking inside the steering column as I drive the Pantera. So - time to make something. Here's a shot of the problem.
The steering wheel just isn't big enough to cover all the stuff crammed inside the steering column. I started the process by cutting a piece of round metal sheet the size of the opening in the column. I put a hole in the middle of the round plate that enables me to slide the plate over the mounting nut of the removable steering wheel. The plate will be screwed into the cast and tapped guts of the column itself. Here's two shots showing the plate in place.
You can see that I tacked a piece of exhaust pipe to the plate so that it would mate up to the quick disconnect part of the steering wheel. Now I want to taper that insert so that it will look better when mounted in place. To do this I use a great tool - Great Stuff sealer. See the shot below.
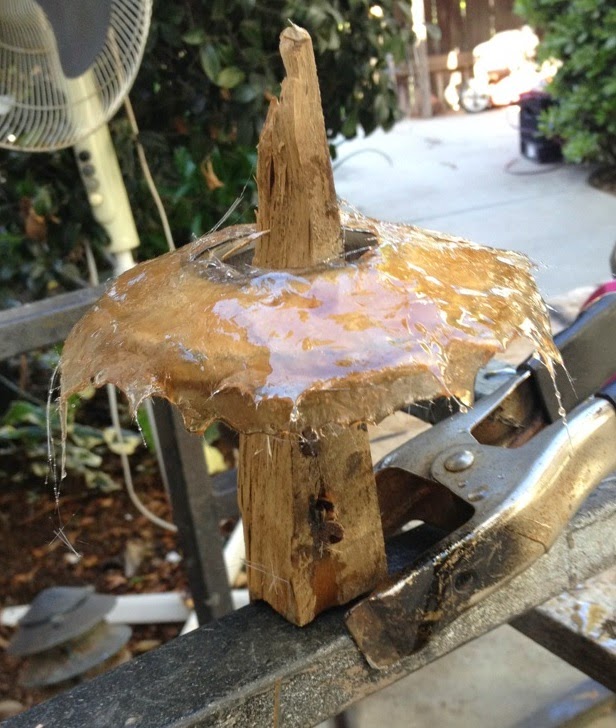
I love using Great Stuff as a base for shaping parts that I'll be making with a fiberglass top coat. The Great Stuff expands and fills all the gaps on metal or wood. It also expands to where you can shape it when it dries. It takes about 3 hours to be ready to work with. When it dried I was able use my wife's good bread knife (shhhh - don't tell her) to cut it with the taper I wanted to make this hole in the column look right. Here's a shot of the part at this step in the process.
Now comes the messy part - fiberglass. When I first lay the glass it looks terrible. Here's a shot of the next phase the process as the glass dries.
With a little sanding and some bondo the mess above turns into something really different. Check out the shot below - doesn't even look like the same thing as above.
Here's what it looks like in place on the column.
.jpg)
.jpg)
.jpg)
.jpg)
.jpg)
.jpg)
.jpg)
.jpg)

.jpg)
.jpg)
.jpg)

